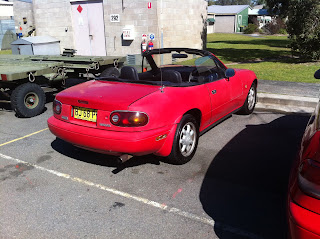
Bought and took the possession of the MX5 today.
Documenting the build of my Locost Clubman and CNC Plasma table all built from scratch.
Friday, 5 August 2011
Wednesday, 3 August 2011
Cost update
Cost update time! Seeing as i went and bought more materials on Monday, i thought i'd keep on updating this one. As it's being built to the "Locost" ethos, i'm trying to keep things as cheap as i can, but keep the quality of the finished product as high as possible.
$1943 - from previously bought materials etc
$138 - Steel (25x25, 20x20 and 50x25mm RHS blue painted)
$39.80 - Material to make the build table extension.
Total so far for those who hate maths - $2120.80
So so so so freaking excited. Havent been this excited about a car since i originally bought the WRX. And that was 5 years ago. Maybe this project will be the re ignition of the passion for cars.
Tuesday, 2 August 2011
Day 4
Day 4 of the build and the final day of the 4 day building streak. Yet another productive day was had, and i'm stuffed. Will have to go back to work for a break. My back is sore from using the horizontal bandsaw as ours needs to have the speed of the cut controlled, otherwise the saw seizes.
So what was done today? Well i put the firewall cross member in as well as the entrance to the transmission tunnels. The front engine cross braces and the engine vertical brace went in as well. As per usual, every piece needs to be cut to the dimensions of the frame. While i'm 0.5 or 1mm out in some areas, it seems that if the pieces are cut exact to the book, it doesn't quite work.
Oh went to Metal Mates in Cessnock and bought extra material. Got another 3 lengths of 25x25mm. Then got a length of 50x25mm for the seat back rest, and 3 lengths of 20x20mm for the transmission tunnel and the rear of the car. A trip was also made to Bunnings to pick up some more MDF so i can extend the build table. Which needs another 800mm so i can build the rear differential carrier and suspension carrier.
This is how i ended the day. Looks awesome. Hopefully next weekend will lead me to have the transmission tunnel and seat back in place. I still havent gone for a 'drive' in it yet, i'll hold off till it's welded properly
The best looking bit of it at the moment. Well i think so as it was the hardest part.
Dodgy looking tack welds, but they hold and are pretty strong. Takes a hell of a lot of grinding to undo them. That's a good thing!!
Monday, 1 August 2011
Build continues
Well its the end of day three of the build and im feeling really excited about the whole thing. More so now i have the semblance of a chassis.
Saturday and Sunday i built and tacked together the bottom frame. I even got a photo with me holding the completed bottom frame, which i'll put up when my dad emails me the picture.
Today i tackled the front frame. Which is a nightmare of a thing to build. Compound angle cuts, notching and bending tubing, making a jig and then crossing fingers when it all comes together. Guess what?? It worked. I would say first time around, but that would be a lie. I stuffed about 2 meters of material getting the compound angles etc correct. And trial and error on making jigs.
I also got motivated and went back after dinner this evening and it's now in the third dimension with the uprights and the top rails going on. Its amazing to see that being accurate pays dividends. With the top rails, they get fixed to the front frame and then rest along the top of one upright and but against the other upright. With these three points, there was only one upright which was out, and that was only by 1mm.
And as always, the trusty work dog is helping out.
Bottom rails before tacking. Also made a mistake on this, but it's now fixed. Was an easy fix too, sort of. At the front of the frame are the two parrallel members with the really sharp angle. I took the wrong dimension and had to remake these as i had cut them too short. It involved another hour and a half working at the milling machine to get those angles perfect.
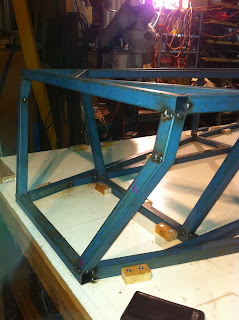
Here you can see the blocks holding everthing in place. The two members i mentioned before are worng. If you look at the next picture the two new ones extend past the horizontal cross piece.
Ah the dreaded front frame. Looks simple from this angle, but it's bloody hard. I now know what not to do when it comes to fabricating one of these.
Front frame again. The two silver bits of metal clamped to the frame are there to ensure that it wasvertical and at the same height the whole way across. And it is!!
Building the thing finally. WOO!!
Start of the frame. Wooden blocks are attatched to the build table to hold the frame in place. This has worked extremely well. I've had the frame off the board once already and it went straight back on.
Where the seats will be mounted.
Subscribe to:
Comments (Atom)


